Queen's Domain Map
The game has no map. This one shows how its 12 areas connect, and its checklist covers all 434 things 100% asks for, including the 69 Silver Skulls and 50 Orbewa Eggs. Pick an area to see what is there.
Free: Isle of Neasied, Obmuer Temple and Umbada's Trading Outpost with every location, and the name of every entry everywhere. $2.99 once: the locations of all 282 entries in the other 9 areas.
Isle of Neasied
Way in: Start of the game (shipwreck beach).
At the starting camp: break the wooden barricade on the path out of Commander Ekonta's camp. The monument stands right behind it on your left; it is the first monument of the game.
From Knight's Encampment follow the eastern uphill road; at the later fork take the left branch and dash across the gap to the graveyard. The monument stands by the gravestones on the cliff.
Activates by itself the first time you use any Wing Altar (normally the Obmuer one after Dagoom). It stands beside a tall spire with a Grilled Fish platter beside it, above the underground Halls Shrouded in Darkness.
Underworld, below the Isle: from the big bridge to the Mausoleum drop into the round stone enclosure on its left, turn back across the poison pit to the brazier. Go left to the pillar-ringed room and ride its lift to the top.
Endu Shrine: from the Dagger Belt coast cross the short mossy stone causeway over the turquoise water to the single broken arch. Open the gate with the Endu Shrine Gate Key from the bottom of the Crypt.
Comes installed in Holy Sword Endu, taken from the altar inside the Endu Shrine after the Shrine Guardian (the broken arch at the end of the mossy causeway off the Dagger Belt coast).
Above the Cemetery Precipice monument: hop up the rocks onto the slope, go forward, dash first to the broken pillar on the right and from there to the stone altar with the gem.
Off the Isle coast: from the Mossy Golem cliff above the starting beach, fly across the islets (one has the chef's chimney) to the far island. The lens is in a chest inside the round house behind the big beach rock.
Underworld below the Isle Wing Altar (Halls Shrouded in Darkness): through the hidden-wall rooms, ride the elevator to the bottom floor and turn left. The statue is in the big room with the treasure vault.
Below the Isle: the statue is visible from the tomb room under Cemetery Precipice where the Strange Stone Block and the Rubedo book lie. Reach it from the Halls Shrouded in Darkness side by dashing over the dark pit.
Isle of Neasied, at the Cemetery Precipice monument: the orange seal between the gravestones.
Your starting weapon: Commander Ekonta hands it over at the campfire on the beach before the wooden barricade and the Knight's Encampment Crystal Monument.
From the Knight's Encampment monument, follow the slope on its right to the end and turn right; the chest is inside the ruined tower.
Crypt below the Knight's Encampment (open its door by throwing a dagger at the diamond switch): go straight to the end, turn right, chest.
Cemetery Precipice: walk round behind the small tomb building, enter the broken hole, pull the lever to open the floor hatch and go down; the chest is inside.
Velvet vault, Underground World below the Isle: from the Halls Shrouded in Darkness monument ride the elevator down; the vault is past the two pillars. Way in: cliff cave across from the Isle Wing Altar, drop down the hole, hidden door.
Endu Shrine: from the Dagger Belt coast cross the mossy causeway to the single broken arch, beat the Shrine Guardian and take the sword from the altar beyond.
Back at the tower in front of the Knight's Encampment monument, air-dash to the jutting rock on its left; the club is stuck in the ground. Breaks at Lv. 5 into the Symbol of Jigeki.
Crypt below the Knight's Encampment, bottom level: turn right and open the hidden wall where a brazier is missing beside a broken pedestal, near the Endu Shrine Gate Key room.
Underground World below the Isle: from the Halls Shrouded in Darkness monument go down to the Silver Skull on a stone block two floors below the top; the hidden wall left of it hides the claw.
Cliff above the start beach, past the Cemetery Precipice Wind Gem: kill the buried Chilopoda and hit the mossy stone on the ground with an Impact weapon; the Mossy Golem drops it (not guaranteed every kill).
Chest at the Knight's Encampment, opened with the Knight Expedition chest key that lies on a bag at the top of the Deimpo Mausoleum's giant spiral stairwell.
From Cemetery Precipice cross the broken bridge north to the Tower of Knowledge door; the glowing gargoyle in front of the door holds the torch.
Dagger Belt: from the Knight's Encampment go uphill, take the rock gaps right, and jump to the farther of two small rock islands off the coast near the shipwreck; it hangs on a branch.
Isle of Neasied, route from the Knight's Encampment toward Cemetery Precipice: the chest opposite the iron gate, below the building whose middle floor has a Roasted Poultry. A mimic chest is nearby.
Knight's Encampment shortcut: hidden wall in the bushes on the right (Roasted Poultry room), through the Trident Key door to the door that needs all five keys; beat the White Tree Guardian.
Crypt below the Knight's Encampment, bottom level: turn left, open the hidden wall (Broiled Meat room); the chest is on the opposite side.
Chest at the Knight's Encampment, opened with the Knight Expedition chest key from the bag at the top of the Deimpo Mausoleum's giant spiral stairwell.
From the Cemetery Precipice monument, air-dash north toward the Tower of Knowledge to the distant broken bridge. The egg sits on its high stone steps where the bridge collapsed.
At Cemetery Precipice, go to the tomb building in the cemetery and drop off the cliff on its left side. The egg lies outside the cave entrance in the cliff below; the cave holds The Great Work IV - Rubedo.
From the Mossy Golem cliff on the Isle of Neasied (where the Golem's Broken-Arm Hammer drops), dash out to the Star Lizard islet and on to the far islet with the chef's chimney. The egg is on that islet; a Silver Skull sits on the chimney.
Endu Shrine, Isle of Neasied: from the Dagger Belt coast cross the mossy stone causeway to the single broken arch at its far end and defeat the Shrine Guardian. The duck drops from it and opens Umbada's shop.
From the Cemetery Precipice monument, go round behind the building on its left, drop down and smash the crate to the right of the skeleton; the book is inside. It is a decoy for the Tower library shelves.
Below the Isle of Neasied cemetery: drop off the left side of the tomb building to the cave mouth with an egg outside. Inside, at the foot of the stairs, the book is on the altar right of the central pillar with the stone block.
Underground World, below the Isle of Neasied Wing Altar: enter the cave beside the altar, drop down the hole at its back, open the hidden door and ride the elevator down past the Halls Shrouded in Darkness. The vault is past the two pillars.
From the Mossy Golem ledge on the cliffs past the Cemetery Precipice monument (where the Golem Arm Crusher drops), fly across to the islet with a Star Lizard and on to the islet beyond it. The skull sits on top of the chef's chimney.
At the Isle of Neasied Wing Altar, fly up to the gap near the top of the blue-flame spire standing beside the altar. The skull is tucked into that broken crevice.
In the Endu Shrine, the room where Holy Sword Endu is taken after the Shrine Guardian fight (across the mossy causeway from the Dagger Belt coast). The skull is on top of the sword altar.
On the outer island beyond the chef's chimney islet, find Wodaso's circular house on the beach (its chest holds the Wodaso Lens). The skull is on the roof of that house.
Underground World, below the Isle of Neasied: at the Halls Shrouded in Darkness monument, ride the adjacent lift to the top. Jump down two floors to a stone block; the skull is on it, with a secret wall to its left.
Ticks are saved in this browser. Each later area also shows one Silver Skull and one Orbewa Egg location free, so you can see what the pass gives before you buy.
Where to go next
The order most players take. Each area page has the route step by step, its Crystal Monuments, bosses with weaknesses and every enemy's stats.
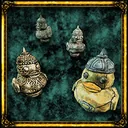
The whole route on one page, from the shipwreck to all four endings
Getting around without a map
Does Queen's Domain have a map?
No. There is no world map, minimap or quest marker in any version (PC, PS5, Xbox Series X|S, Switch 2). The map above is a route diagram: north is roughly up, it is not to scale, and each line is a path you can take once you hold the item that opens it. Hover a line, or open an area page, for the requirement.
How many Silver Skulls and Orbewa Eggs are there?
69 Strange Silver Etched Skulls and 50 Orbewa Eggs, and the game counts neither. Eggs go to Erma for Sacred Waters (4.0% of Steam players). Skulls are handed in for rewards in steps: the Ancient Stone Duck at 10, the Flying Mushroom Fossil at 30 (it lets you fly, which many later skulls need), and all 69 are needed for The Call From Beyond (2.2%) and Ending 4. Full lists by area: Silver Skull locations and Orbewa Egg locations.
Crystal Monuments and Wing Altars
Crystal Monuments are the save points: rest to heal (enemies respawn) or save without resting. Wing Altars are fast travel, roughly one per area, and only connect to altars you have already lit. Lighting all 42 of both earns Well Travelled (6.1%). A Travel Crystal Fragment warps you to the last monument you used; a Wing Stone Fragment to an altar.
What opens new areas
Mostly air dashes. Holy Sword Endu gives the first, and each Wind Gem adds one: two dashes cross the broken bridge to Obmuer Temple, three reach the Tower beacons. The Azure Torch lights the gargoyle beacons, the Acid Vial bursts the flesh growths, and the Mask of Second Sight shows the late hidden walls. The order, step by step.
What the Tracker Pass adds
Isle of Neasied, Obmuer Temple and Umbada's Trading Outpost are free in full. For the other 9 areas the free tracker lists every entry by name, so you can see what you have not ticked, and shows one skull and one egg location per area as a sample; the pass ($2.99, one payment) adds where the other 282 are and what you need to reach each one. It works in any browser, and the email you pay with signs you in on another device.